Shoot 35mm with Your 120 Camera: Film Spool Tutorial by Ben Cushwa
39 Share TweetThis is a guest post from photographer and camera tinkerer Ben Cushwa. You might remember him for his Mamiya C33 that he paired up with an LC-A Instant Back. He returns with another DIY project that you might want to add to your to-do list.
Being able to shoot 35mm film on a camera that takes 120 film is quite handy; both practically and artistically speaking, it gives you more options. Unfortunately, medium format cameras come with a wide array of loading and winding systems so there is no “one size fits all” way to adapt 35mm into a 120 camera. But I think I cover enough of the possible things that you have to consider in this tutorial to be useful to anyone who wants to give this a try.

Things you will definitely need: One 120 film spool and some basic cutting and filing tools.
Things you may need: A dark bag or a dark room.
Things that are nice to have: An additional 120 film spool, and a short length of 35mm film, and some tape.
Part 1: The Basics

The one essential thing in order to shoot 35mm film in a 120 camera is a pair of adapters to hold the 35mm film in the camera. You can order them online or even download 3D printable specs, but if you already shoot medium format film you can make one yourself. This is what the 120 film spool is for. Cut the 120 spool into three lengths: 23 mm from one end, and 24 mm from the other. (The middle section can be discarded or recycled.) Then take these two lengths of 120 spool and file down the “spool” portion until it is 8 mm in diameter. Et voila! You now have a set of adapters to load 35mm film into any 120 camera. Simply load the adapted film canister in your camera as you would 120 film and you can start shooting. The shorter one goes into the “top” of the 35mm film in order to keep the film roughly centered; it will still work if you reverse them, but your images won’t be in the center of your viewfinder. I painted my “top” adapter white, so the bottom one is black to help me remember which one goes where. The two adapters will also fit easily inside a 35 mm film canister for easy storage.
Part 2: Operation
This part depends highly on the kind of camera you have.
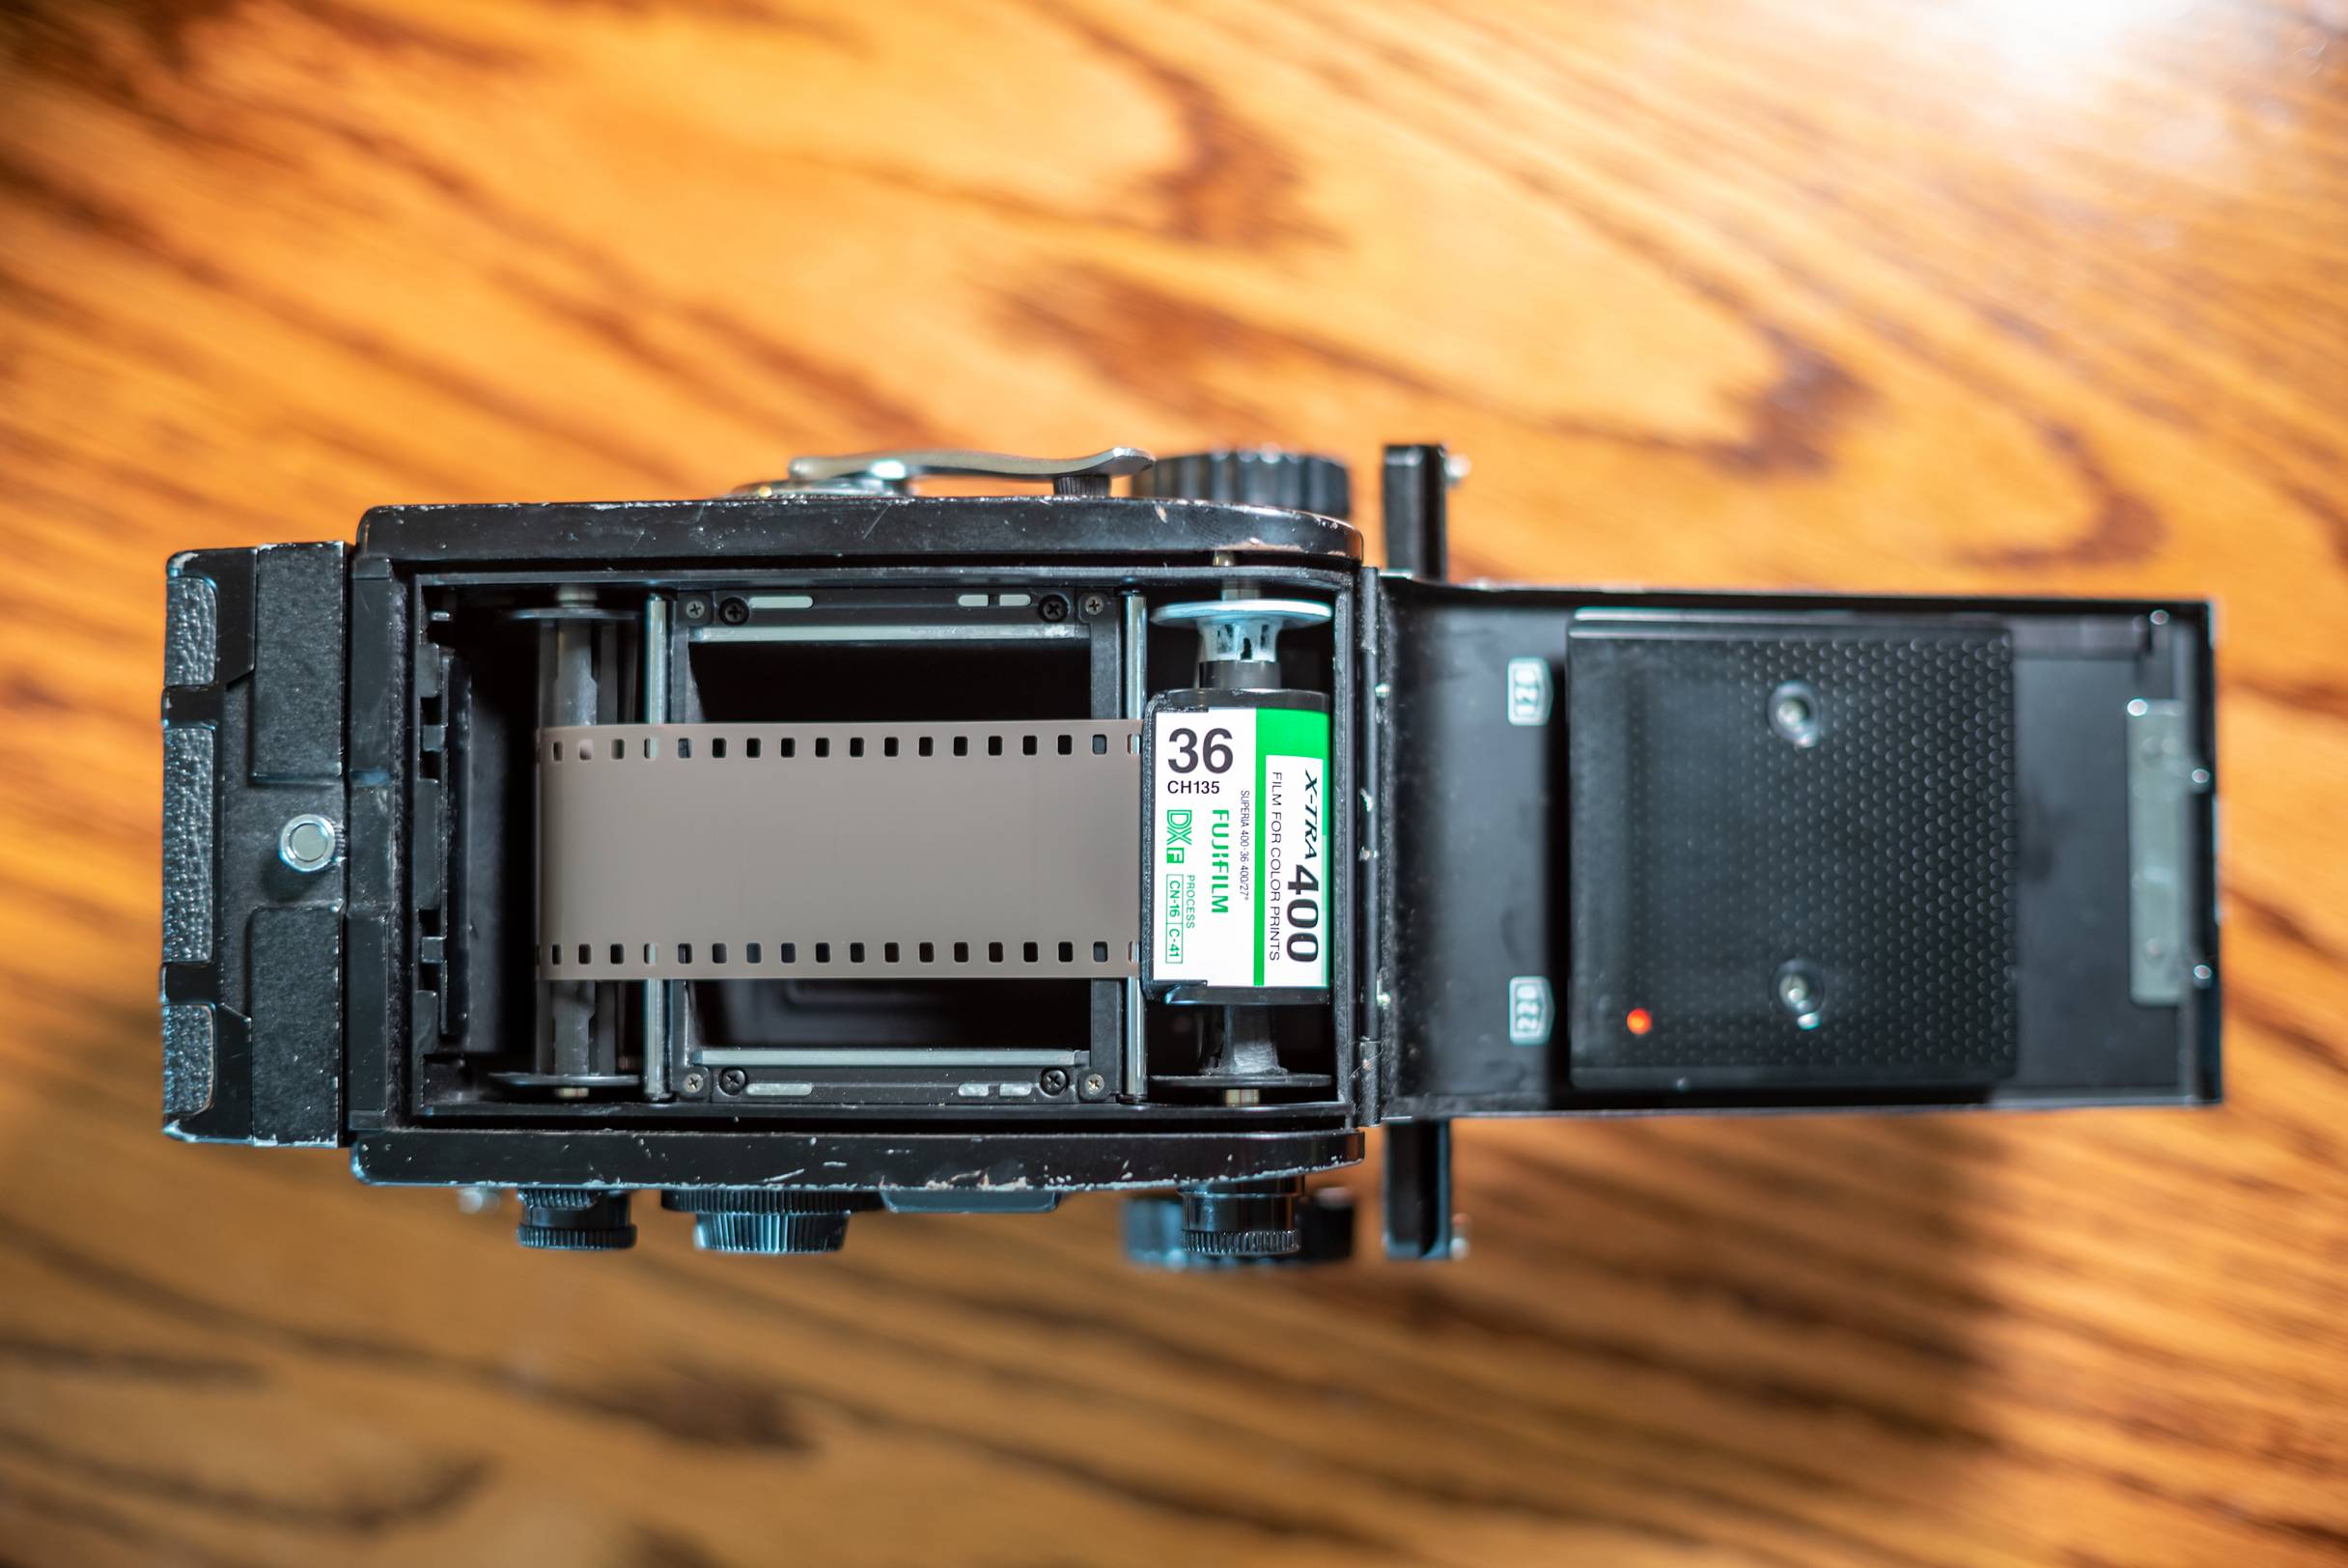
Most 120 format cameras do not allow you to rewind film back onto the original spool. If this is the case for your camera, you will need a dark bag or a darkroom in order to unload your film. 35 mm film is attached to its canister so you can’t just wind it onto the second spool like you can with 120 film. Also, 35mm lacks any of the backing paper that 120 film has, so even if you could, you’d flash your film. This means that in order to unload your film, you need to place your entire camera (or your film back if your camera uses a detachable one with a dark slide) into a dark bag or darkroom, open it up, and either move the film directly into a developing tank or wind it back into its canister to develop later.


Also, if your camera has an option to handle 220 film instead of 120 film, set your camera to do so. 120 film has a paper backing over the entire length of the film, while 220 does not. That means that a camera has to turn the takeup spool slightly more for each frame for 120 film than it does for 220 film. You can still take photos with 35mm film if your camera is set to 120 film, but because it’s winding slightly more in between shots to account for the absent backing paper, your exposures will be more spaced out and you won’t get as many per roll.
Part 3: Fine-Tuning
The basic setup I described above has two shortcomings: the film can “wobble” as it wound, and some exposures may be lost due to the longer pre-wind of 120 film.
Preventing film “wobble” is easy. Take a second 120 film spool, insert a piece of 35mm film into it, center the film, and wrap some lengths of tape at the edges of the film, leaving enough space so that the film can still be inserted freely. Now you have a dedicated 35mm takeup roll that should keep your images centered in the viewfinder.


Maximizing your number of exposures per roll will require some trial and error. If you have a simple camera that uses manual winding, you may not need to do anything beyond knowing how far to wind your film before shooting. But for cameras with more advanced winding mechanisms, you need some way to account for the fact that your camera will wind more film out than necessary before shooting. What I did was take my first roll of 35mm film that I put through a 120 camera and measured off how much useful film was “wasted” in that roll; I lost roughly two exposures. I then cut a length of film that was long enough to cover that “wasted” space, taped it to the exposed end of my next roll of 35mm film, and this time I had good exposures over the whole length of the film. Be careful not to add too much film to your roll though or your first exposure may be cut off.
Conclusion
By my third roll, using a film extension and with my camera set to take 220 film, I was able to get exactly half as many exposures on my Mamiya C330s as a roll of 35mm film was rated for: 12 exposures on a roll of 24 and 18 exposures on a roll of 36.


If your camera uses a simple, manual winding system, you should be able to get that many exposures after a little bit of experimenting. If your camera uses an advanced winding mechanism and does not accommodate 220 film, expect to get about two fewer exposures as they won’t be spaced as closely together.
Enjoy! And happy shooting!
A big thank you to Ben for sharing this awesome tutorial with us! Give him a follow on Instagram and Facebook to be updated with his latest photos and camera projects!
Got some film and camera tips to share? Don't be shy and shoot us an email! :)
written by cheeo on 2020-10-23 in #gear #people #diy #medium-format #120 #35mm #sprocket-holes #ben-cushwa #tech-junkie


未有留言